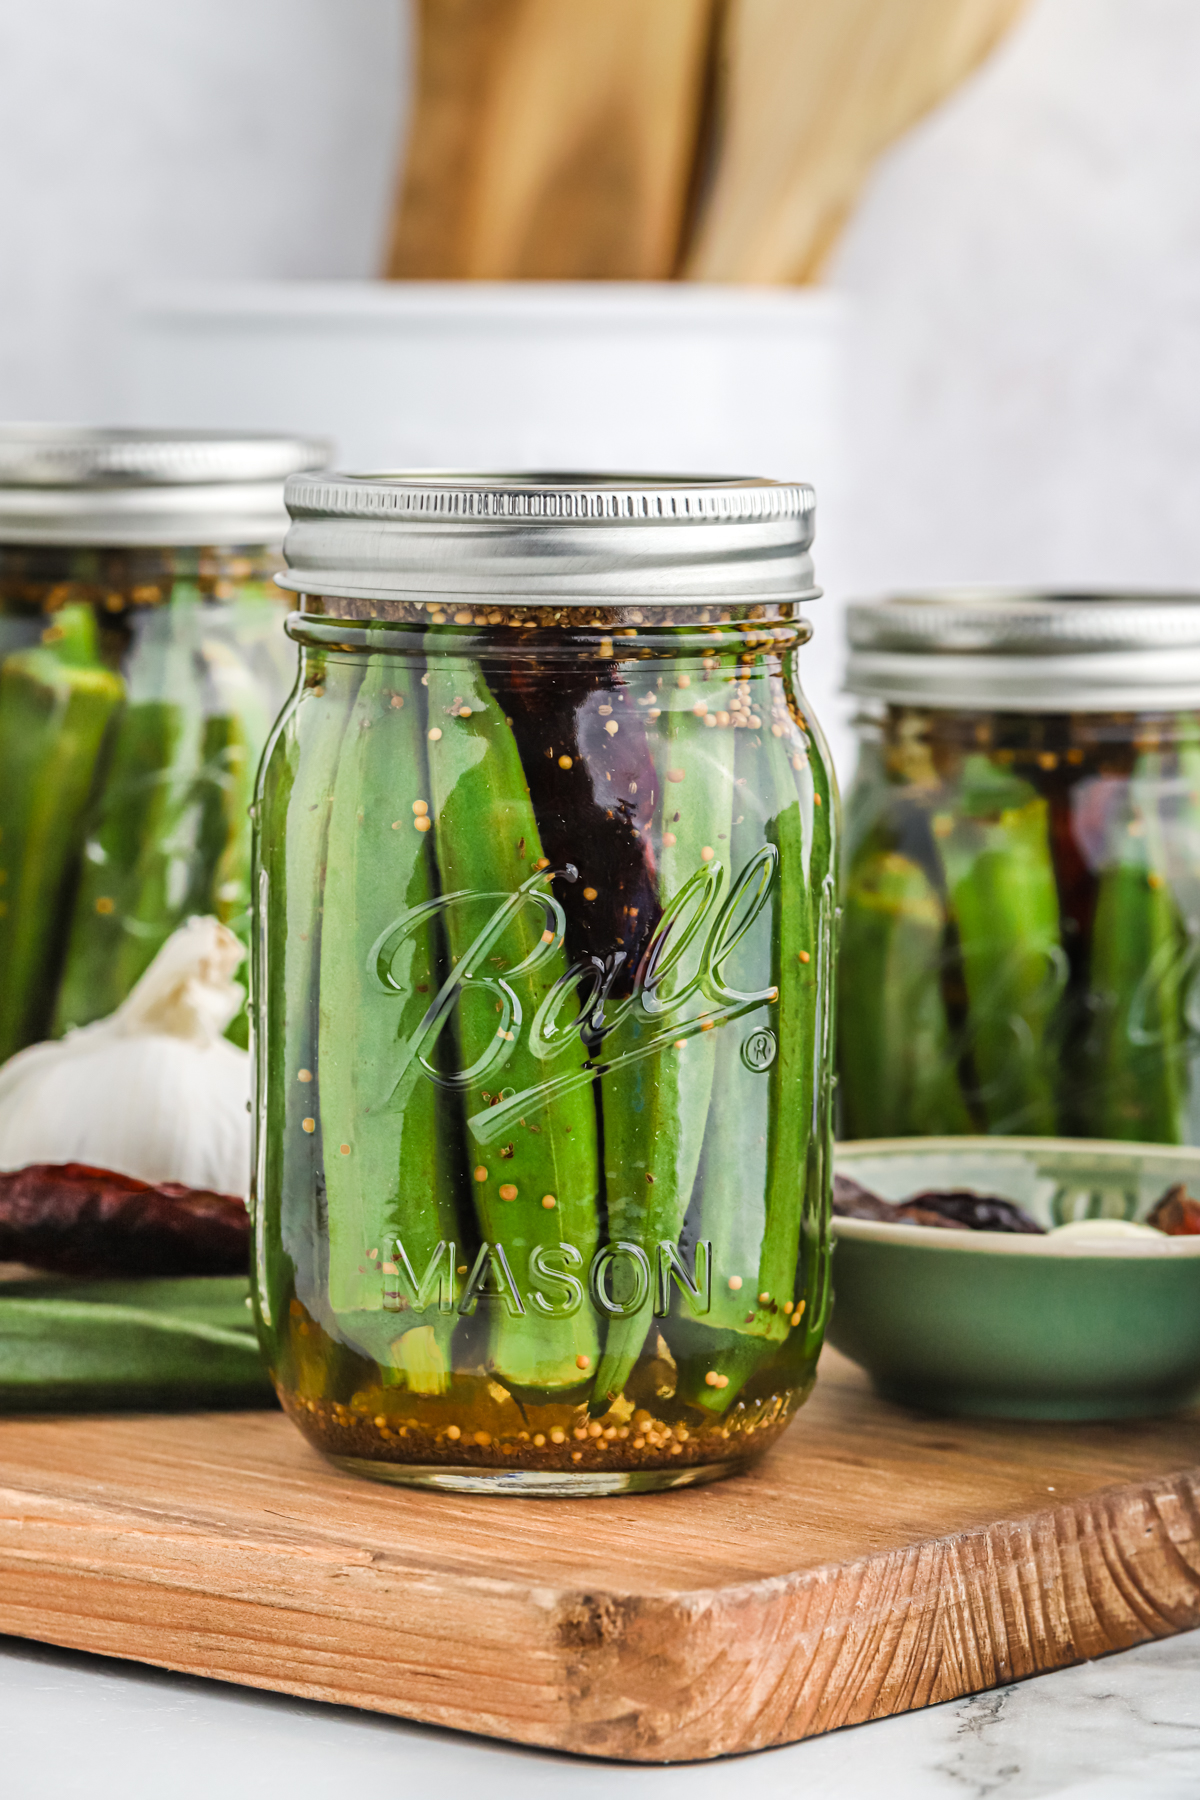
Pickled Okra Recipe
This Pickled Okra Recipe is crunchy, tangy, and easier to prepare than you might think! I'll take you through making the brine, sealing the jars, and everything in between. Don't worry, there are no slimy textures here! If you enjoy this perfectly spiced snack, you'll love my Fried Okra, Okra and Tomatoes, Succotash, and Pickled Shrimp.
If the thought of pickling makes your heart skip a beat, I'm here to walk you through this simple (and amazing) process. I always keep jars of pickled okra on hand!
I mean, who doesn't love a fresh, crunchy, and tangy addition to burgers, sandwiches, or even cocktails (Bloody Marys anyone)?! Maybe I'm alone in thinking this, but okra was made for pickling, y'all!
What is okra?
If you're unfamiliar with okra, let me give you the quick low-down on this green pod vegetable. Okra is native to Africa, but it is now cultivated in tropical areas around the world.
It sometimes goes by the name of "lady's fingers" - the resemblance is uncanny! Okra is synonymous with Southern cuisine in soups, stews, and fried okra. Contrary to popular belief, the texture of okra is not slimy if prepared right!
Can you pickle okra?
You can absolutely pickle okra! In fact, pickled okra may be one of my favorite go-to snacks and sandwich toppers. It's low in calories yet high in fiber, vitamins, and minerals. Check, check, and check!
Once pickled, it becomes crunchy, tangy, and downright addicting. The whole process is so simple. It only takes a few steps and about 30 minutes!
How to choose okra for pickling
When you're pickling okra (or any vegetable), it's important to choose quality vegetables. You're looking for fresh, young pods that are free of blemishes and soft spots.
If you're using pint jars (as called for in this recipe), the pods shouldn't be any longer than 3-4 inches or they won't fit! In addition, smaller pods contain fewer seeds and are generally more crispy.
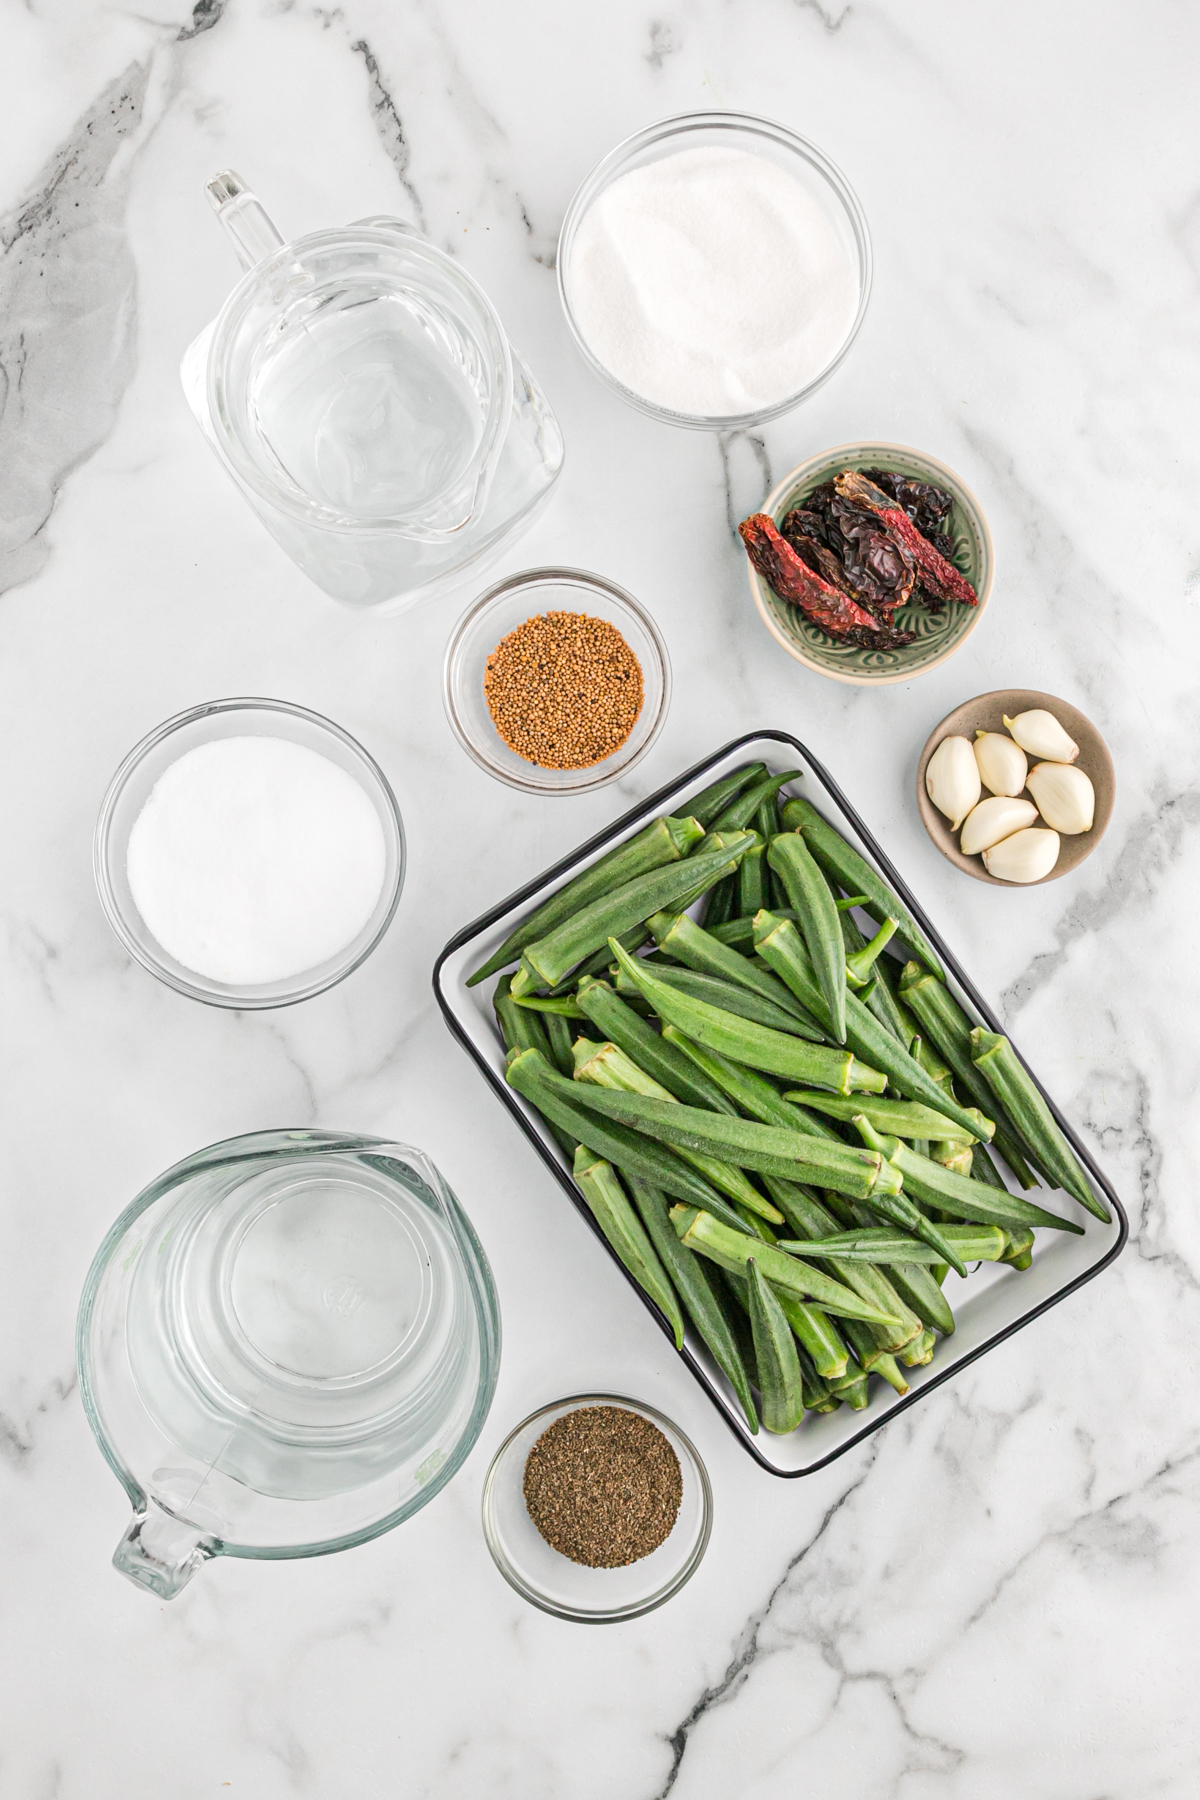
Ingredients
- Okra: You'll find okra in the produce section next to items like peppers, green beans, and the like. It's best if they are all fairly similar in size, but just do your best! You definitely cannot use frozen okra for pickling, so make sure it's fresh!
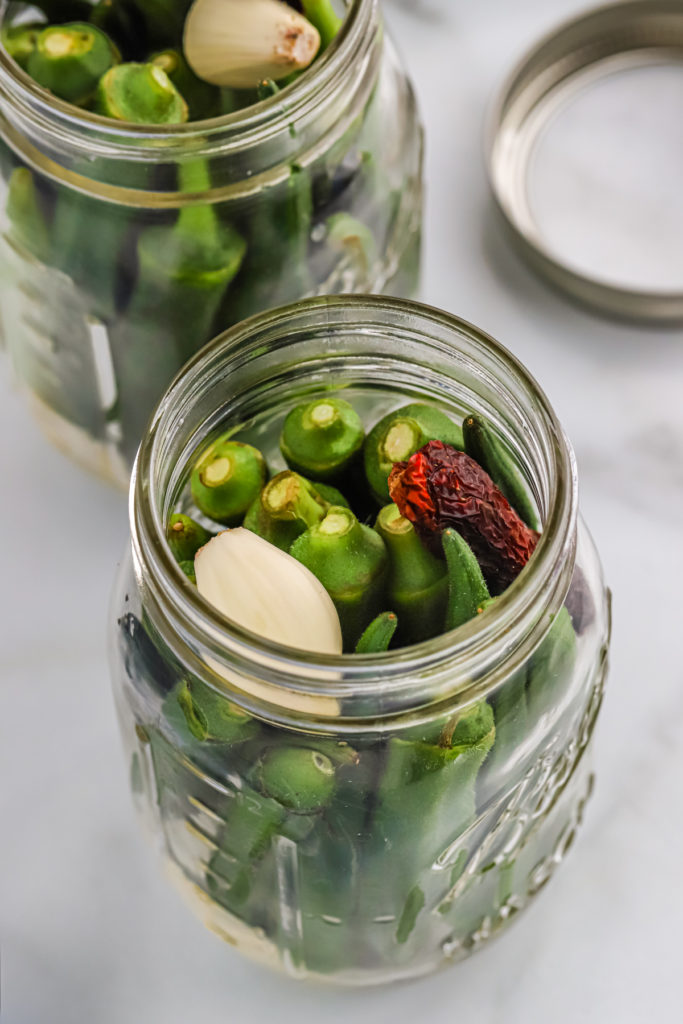
- Garlic: You will want fresh, whole, and peeled garlic cloves. Leave the minced garlic or garlic powder for another recipe!
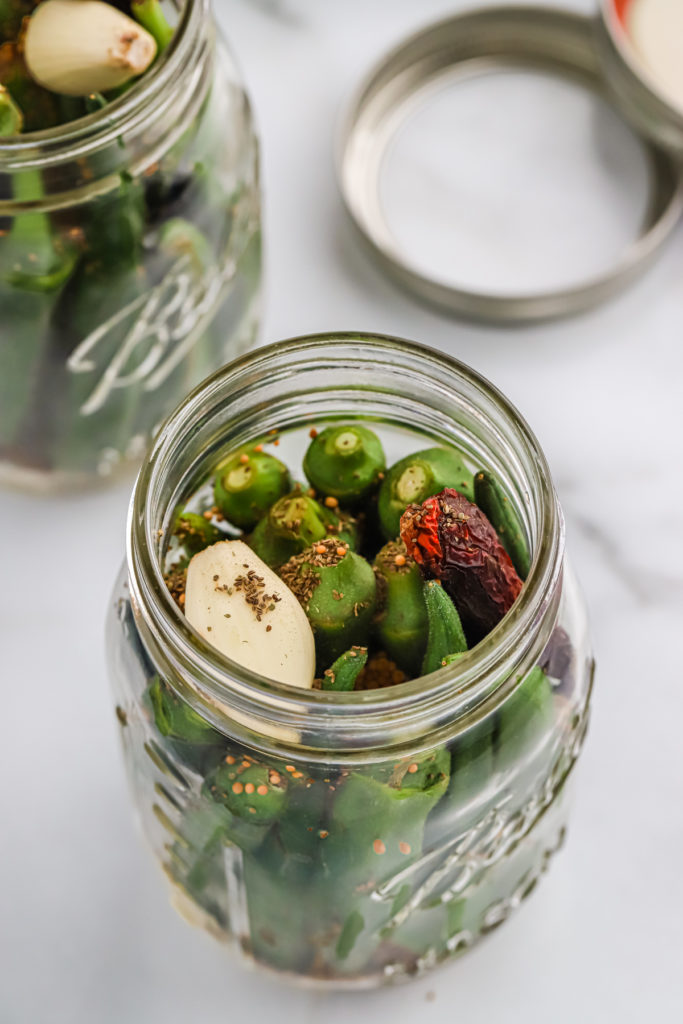
- Pickling spices: I love the combination of hot pepper pods, celery seed, and dill seed in my pickled okra. You can also experiment with different options like red pepper flakes, mustard seeds, coriander seeds, peppercorns, and fennel seeds.
- Salt: For canning recipes, pickling salt (aka canning salt or preserving salt) is your best bet. It doesn't contain any anti-caking ingredients like some other salts, which can result in a cloudy and unpleasant-looking brine. Kosher salt or sea salt will work in a pinch.
- Sugar: While not 100% necessary, I find a dash of sugar helps balance the tang and spice of the other ingredients. Just add regular granulated sugar.
- Liquids: Use an equal ratio of water and distilled white vinegar. The strength of the vinegar must be at least 5% for safety purposes, so avoid less concentrated varieties like apple cider vinegar.
How to make pickled okra

Step 1: Prepare the vegetables
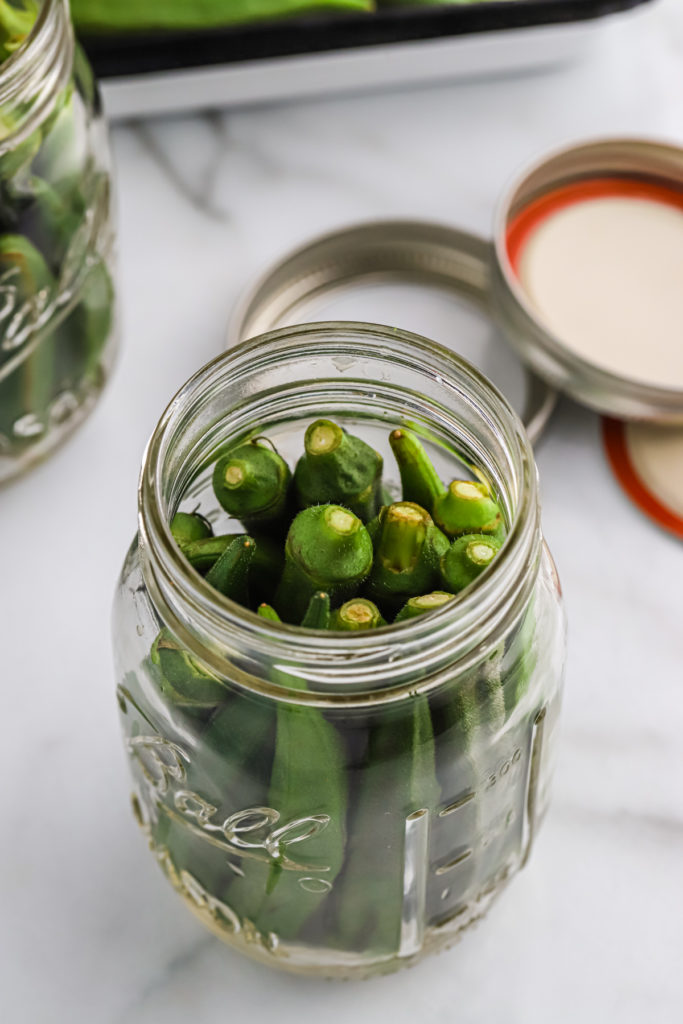
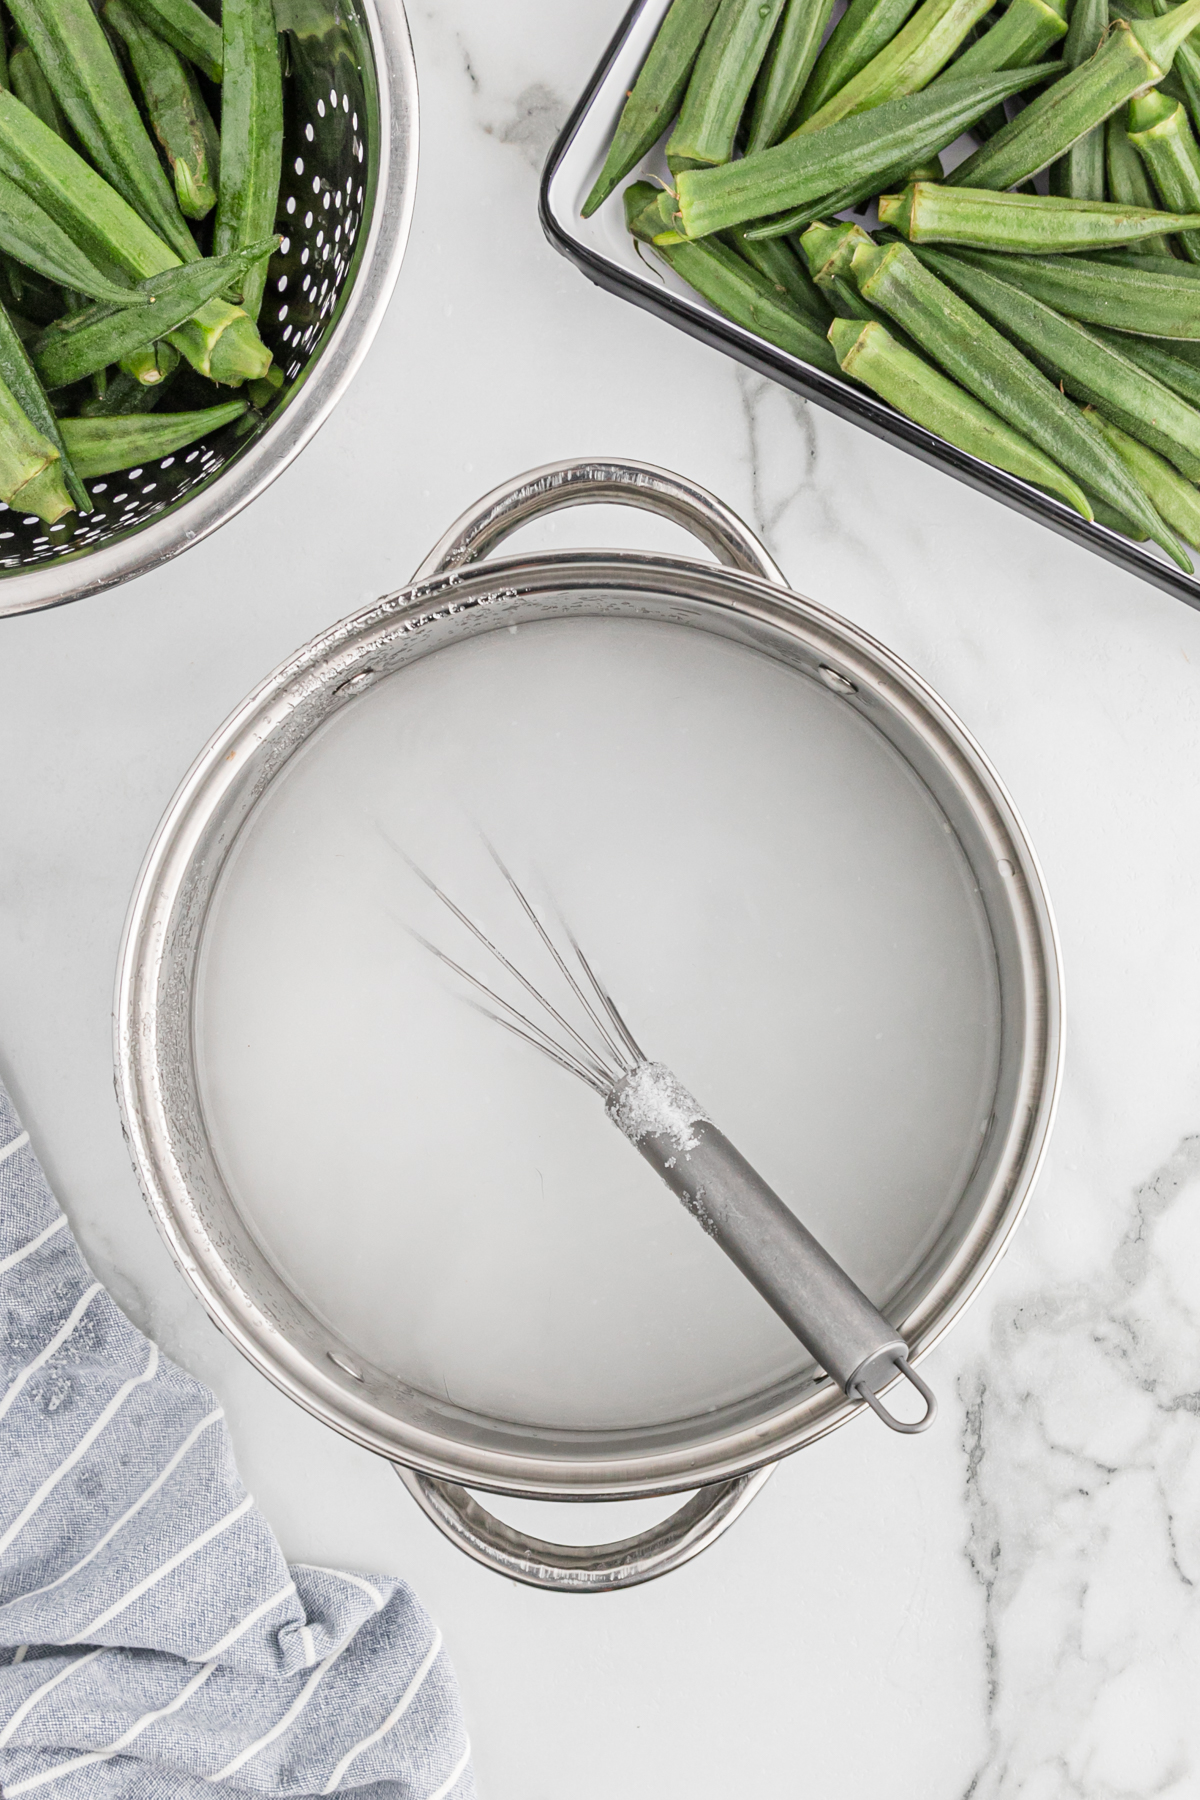
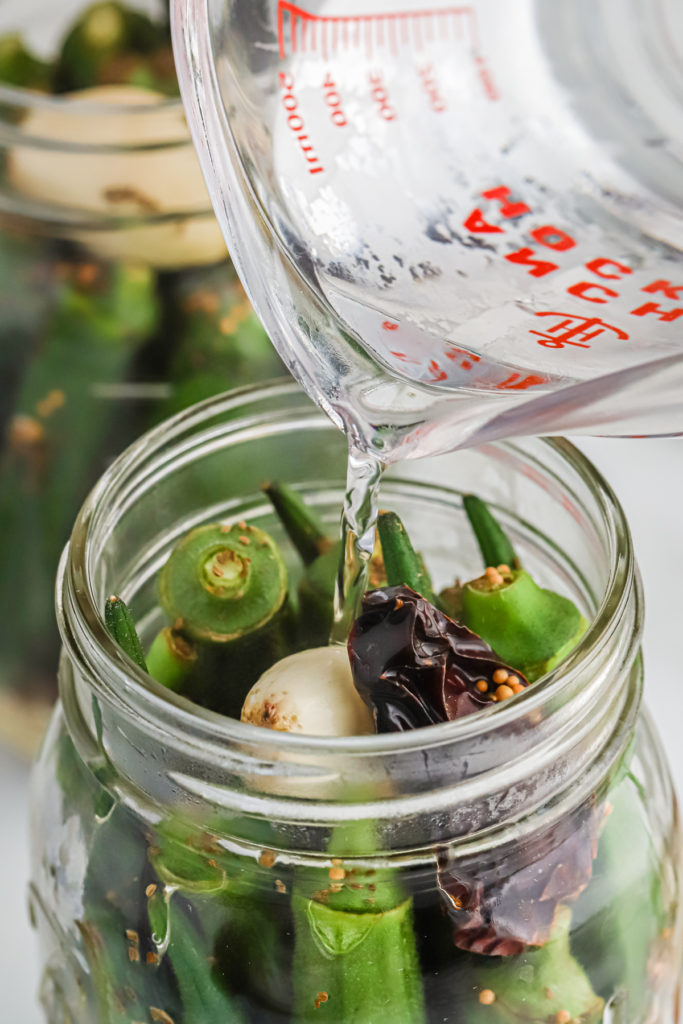
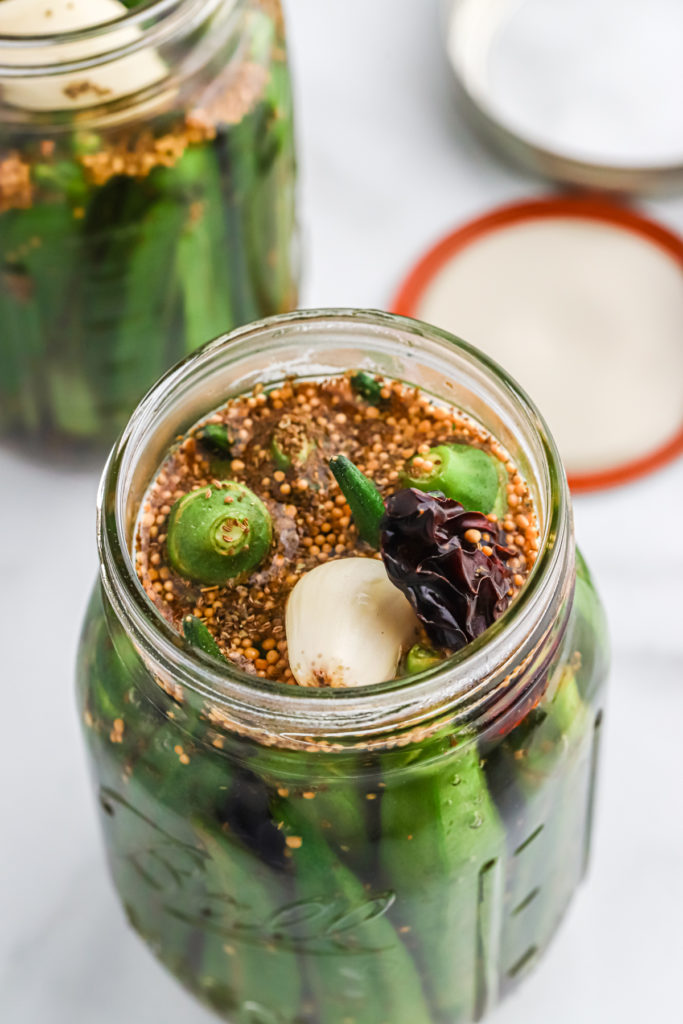
Wash the okra and pack it into 12 sterilized pint jars. Divide equal amounts of garlic, hot pepper pods, celery seed, and dill seed between the jars as well.

Step 2: Heat the liquid
Combine the sugar, salt, water, and vinegar in a pot, then bring the mixture to a boil. Once the sugar and salt have dissolved, pour the pickling liquid into the jars.
Step 3: Can the okra
Cap the jars and cover them with hot water for ten minutes. The jars need to be fully submerged with at least 2 inches of water over top, so make sure you have a large pot!
Tips and tricks
- Sterilize: Wash your lids and jars in soapy water, then sterilize them in boiling water for at least 10 minutes before starting.
- Pack tightly: It's important to pack your jars tightly, only leaving about half an inch of room. This reduces the chances of air pockets in the jar.
- Test them: When you think the okra may be ready, open a jar and test one. It should have a taste and texture similar to a pickle. This means their flavor has fully developed.
- Store properly: To extend the shelf life, okra must be stored correctly. Refer to my storage tips for more details!
More Southern Recipes

Pickled Okra
Ingredients
- 6 lbs okra
- 10 cloves garlic
- 12 dried chili peppers
- 11 teaspoons mustard seeds
- 11 teaspoons celery seeds
- 1 cup non-iodized salt
- 2 cups white sugar
- 2 quarts of water or 8 cups
- 2 quarts of white vinegar or 8 cups
Instructions
- Begin by gently washing the okra, then lovingly pack them into 12 sterilized pint jars. Arrange them with care, alternating the tips up and down for a snug fit.
- Next, distribute equal amounts of garlic, peppers, celery, and mustard seeds into each jar. This is where the magic begins!
- In a large pot, bring water and vinegar to a slow, enchanting boil. Watch for the bubbles to start forming. At this moment, add sugar and salt, whisking them together until they're happily combined. Let this mixture boil for one more minute, then lovingly turn off the heat.
- Now, carefully pour this hot, flavorful liquid over the okra in the jars. Seal them with their lids, then let them sit quietly for 10 minutes. For an even deeper flavor romance, let them sit longer, allowing the flavors to meld and deepen beautifully.
Notes
- You can also use 1 teaspoon of minced garlic per garlic clove.